Overview:
HubSpot Meetings connects to your Office 365 Calendar or Google Calendar and allows people to book appointments with you from a HubSpot hosted form. It takes care of all the syncing to ensure people can only book in when you have free slots in your calendar, and there are options to add buffers and minimum notice periods (ie so people don’t book a meeting with you 2 mins from now just because you had nothing blocked in your calendar).
In my opinion, the Meetings tool is really slick and one of the underappreciated features of the product. It’s been around for years, is mature, feature-rich, and flexible in terms of embedding or sharing.
Using a meetings link, your contacts can access scheduling pages. Once you've connected your calendar, scheduled meetings will sync with your connected calendar so your appointments will always be up-to-date.
Video process:
Written process:
Create Scheduling Pages on HubSpot
- Log in to your HubSpot account, and click on Sales and then click on Meetings.
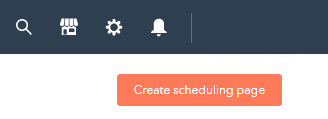
- On the upper right, click Create scheduling page.
- In the dialogue box, select the One-on-One meeting option:
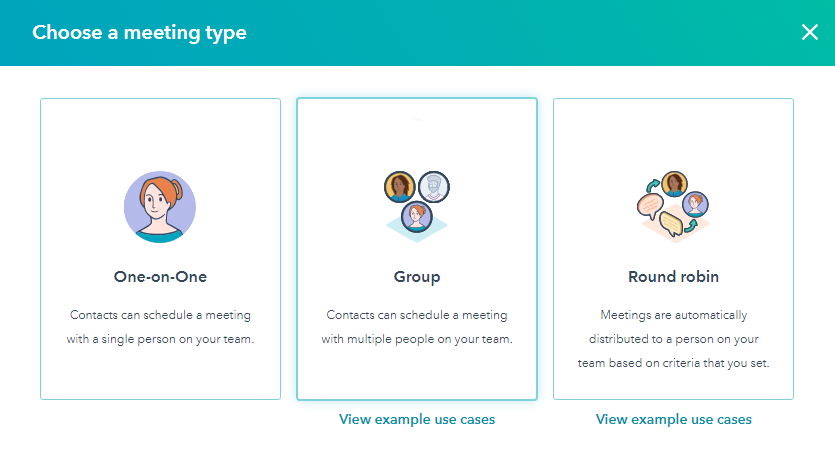
- One-on-One: the contact will schedule time with just you or the user you're creating the scheduling pages for.
- Group (Sales Hub or Service Hub Starter, Professional, or Enterprise only): this team scheduling page displays time slots where all selected team members are available to meet. Use this option to help a contact book a meeting with more than one member of your team at once.
- Round robin (Sales Hub or Service Hub Starter, Professional, or Enterprise only): this team scheduling page shows the individual availability of all selected team members. Use this option to help a contact book a meeting with a team member whose availability aligns best with their schedule.
- Click Next.
- Continue setting up your scheduling page following the steps below.
On the Overview Page
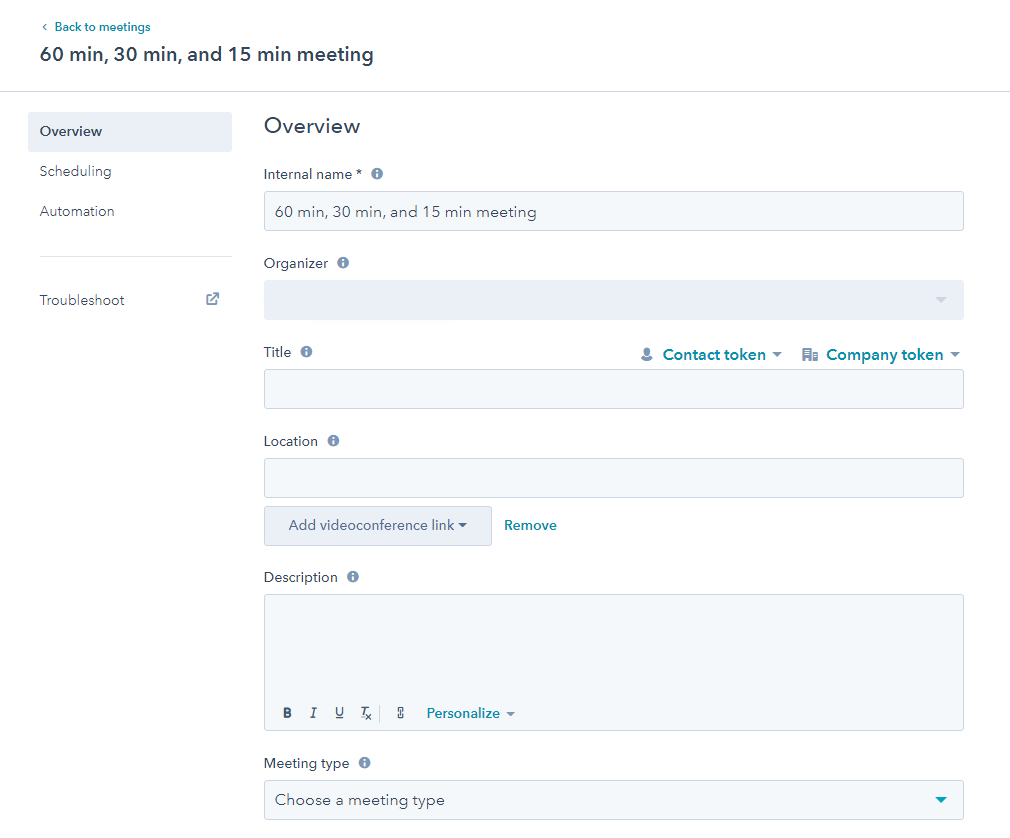
On the Overview page, edit the scheduling page's basic information and set the basic meeting details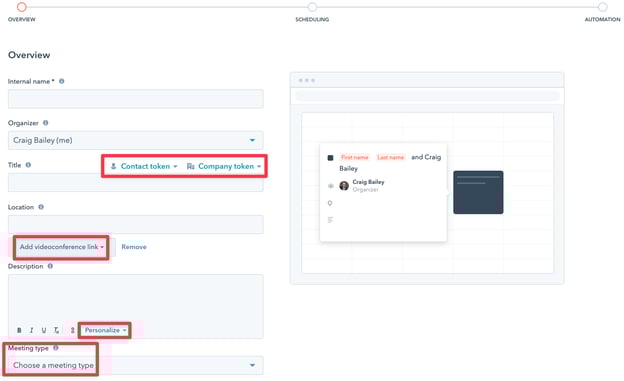
Tip! Three quick items to highlight:
- You can use personalisation tokens in the Title and Description
- You can add video conferencing (eg Zoom or Google meet) and HubSpot takes care of all the details
- You can set the Meeting type (eg Initial call, Qualification, Account Management etc) based on the Meeting types you set up in HubSpot settings
- Internal name: the name that appears when the meeting link used to access the scheduling page is added to an email.
- Organizer: the meeting owner, or the user the contact is scheduling a meeting with.
Please note: you must be a super admin with an assigned Sales Hub or Service Hub paid seat to create scheduling pages for other users in your account. To create a scheduling page for another user, select their name from the Organizer dropdown menu.
- Title: the name of the calendar event you share with your contact. For example, "Product Demo" would appear as the event name. You can insert personalization tokens in the subject by clicking Contact token or Company token.
- Location: include information about how and where you will connect with your meeting attendee. This can be a call-in link, a physical location, etc. This location will appear in the contact's calendar invite, and the event created on your default personal calendar.
- Add videoconference link: if you're using HubSpot's integration with Zoom, UberConference, or Google Meet, you can add a videoconference link. If you have not set up a videoconference integration, you will not see this option. If you're using a different video conferencing software, and you're a developer or there's a developer on your team, learn how to use the Video Conference Extension API.
- Description: a description of the meeting that appears in the invite when a meeting is booked. This description will appear in the calendar invite your contact receives and the event created on your default personal calendar.
- Meeting type (Sales Hub Professional or Enterprise or Service Hub Professional or Enterprise only): choose a meeting type from the dropdown menu.
- When you're done, click Next.
Set Availability
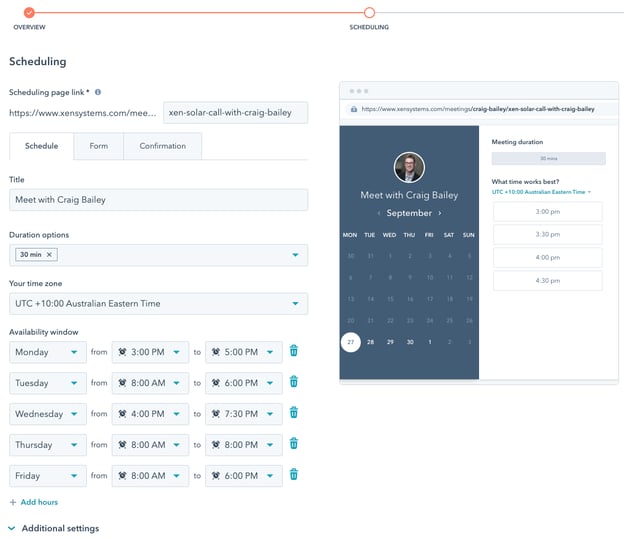
These availability windows will form a venn diagram with your own calendar and will only be shown as available on the HubSpot form if you are BOTH free on your own calendar AND it’s within the availability window settings.
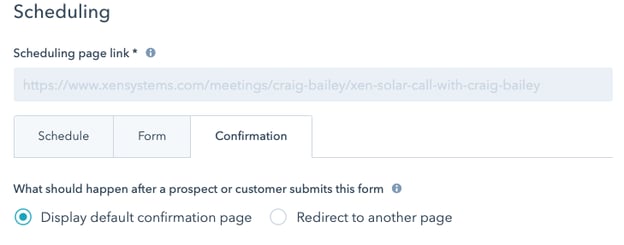
You can also choose to show a confirmation message, or redirect to a separate confirmation page (my usual preferred option):
Next however is the most important feature that is often missed - expand the ‘Additional settings’ section at the bottom so you can set buffer windows:
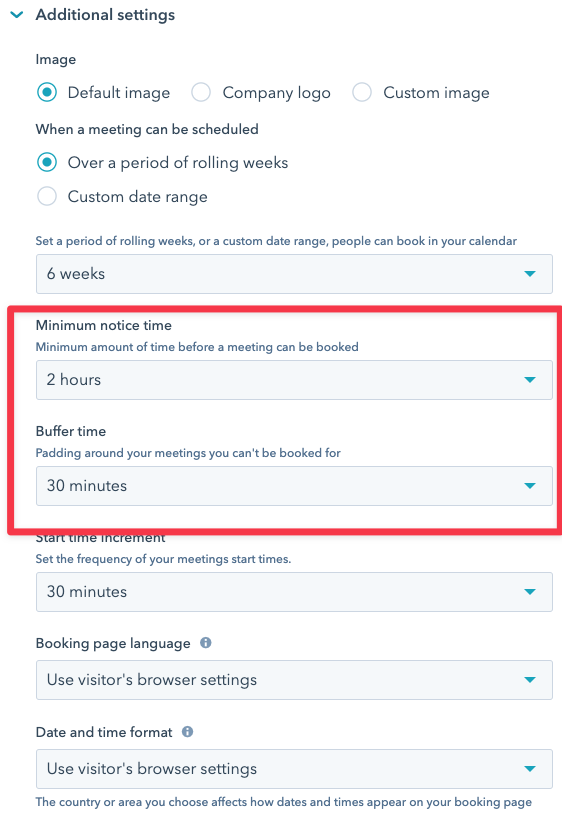
Above is how I set mine - I leave at least 2 hours notice before someone can book in with me - this is because I only check my email a few times through the day - I don’t want to find out I’ve missed an appointment simply because I didn’t check my email.
I also add a buffer time of 30 mins so that I don’t get caught finishing up one meeting and immediately going into another.
You can tweak these to your own liking.
Finally the notification settings:
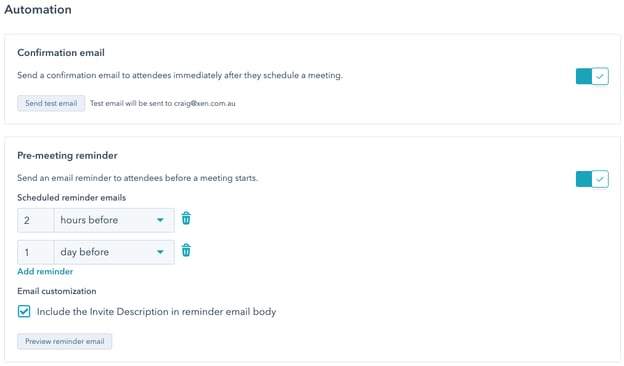
I definitely send a confirmation email, and I also send a reminder the day before and 2 hours before. This can depend on how often people cancel on you at the last moment - I’ve had a few lately, so I prefer they cancel well in advance (I get it, priorities for people change, so I’m not annoyed about them cancelling, I just prefer them to do it well in advance).
Once the meeting is created you can head back to your list of Meetings and then get the link or embed code:

If you build your pages in HubSpot CMS you can easily embed a meeting form directly in the page.
Interested in setting up Group and Round Robin Options? Check out this KB Article.