This process is applicable only to contact and company records, and allows for the import of notes along with the note create date and created by data. You should have a Pro or Enterprise Hub subscription in order to create a custom report.
Process summary
- Create a simple custom report and export
- Import to HubSpot
Unique identifiers
- Contact: email address
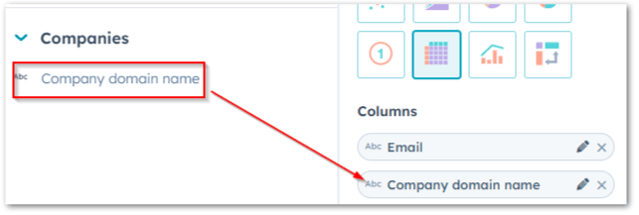
- Company: company domain name
You can learn more about HubSpot's unique identifiers here.
Create a custom report
- Start by creating a custom report
- In your HubSpot portal, navigate to Reports > Reports
- Create a report > Custom Report Builder
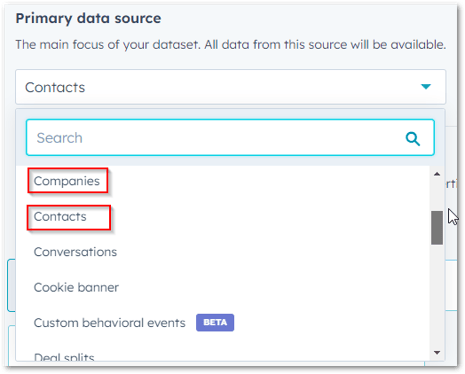
- Choose Contact or Company as your primary data source
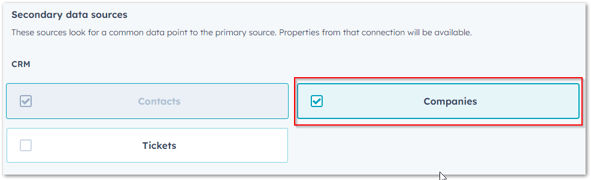
- (Optional) If you want the note to be associated with both contact and company records, select your secondary data source.
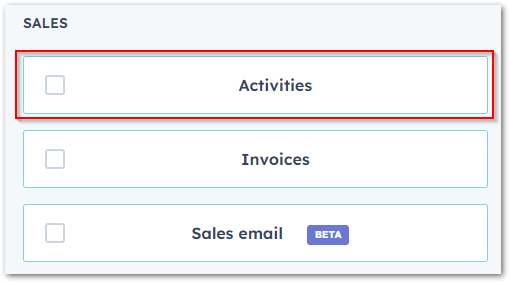
- Choose Activities in the Sales section as your last data source and click Next
- Choose Table as your chart type

- Specify your columns
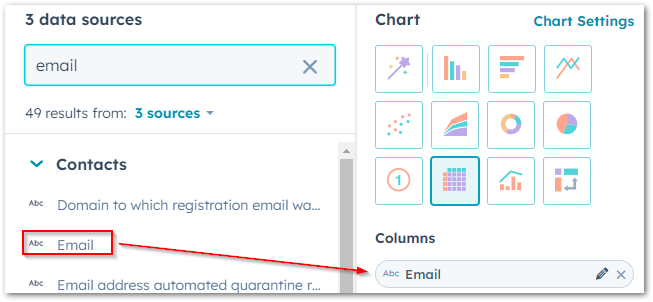
- Drag the Email contact property (if you’re using Contacts as data source) to your columns
- (Optional) Drag the company domain name (if you’re using Companies as data source) to your columns
- Then, drag the following activity properties to your columns
- Note body
- Activity created by
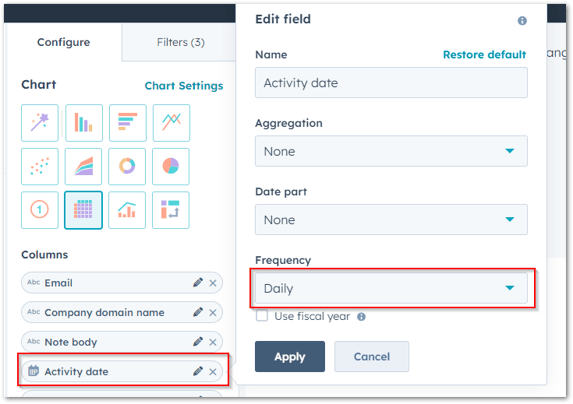
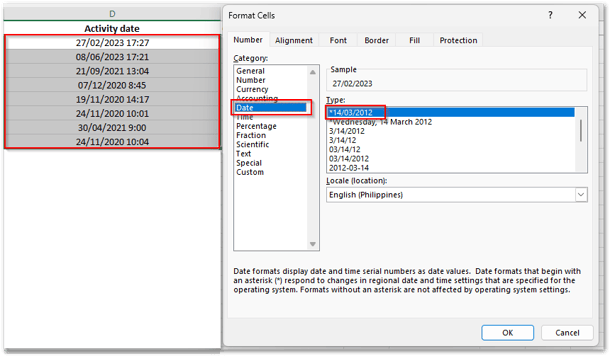
- Activity date - format this to show the exact date (eg: dd/mm/yyyy)
- Drag the Email contact property (if you’re using Contacts as data source) to your columns
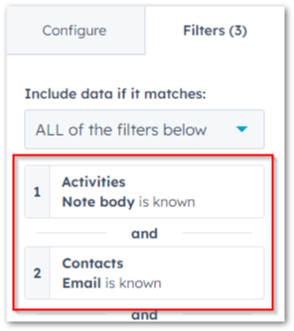
- Add additional filters to your report depending on your requirements. For example:
- Include only notes that has note body and contacts with email address
- Include only notes that has note body and contacts with email address
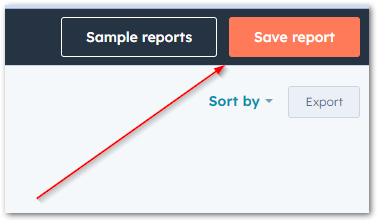
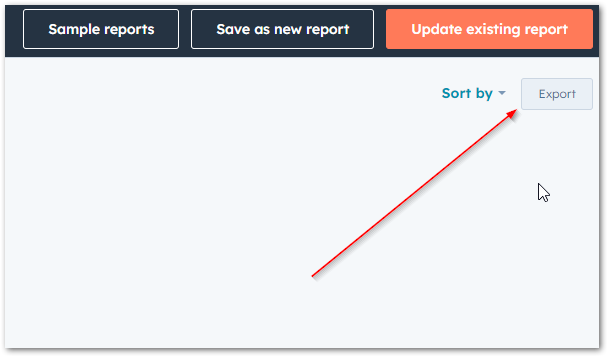
- Once you've set up the report to your satisfaction, save the report
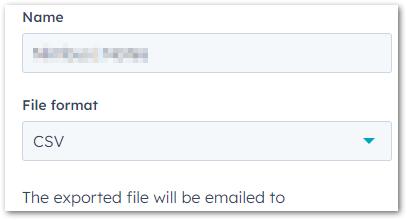
- Then export your report
Review and Import to HubSpot
- Review your exported spreadsheet
- Check the format of the Activity Date column; if it includes the specific time, update the format to remove it, as HubSpot cannot import the exact time a note was created. To do this, format the column as a date, which will eliminate the time.
- Replace the name in the Activity created by column with the user's email address. A simple 'find' and 'replace' will do the trick.'
eg: if the 'Activity created by' says Dharmesh Shah, replace that with dharmesh@hubspot.com
- Check the format of the Activity Date column; if it includes the specific time, update the format to remove it, as HubSpot cannot import the exact time a note was created. To do this, format the column as a date, which will eliminate the time.
- Begin the import process
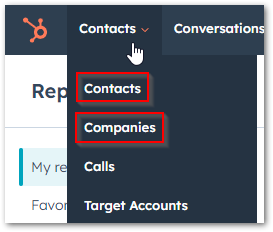
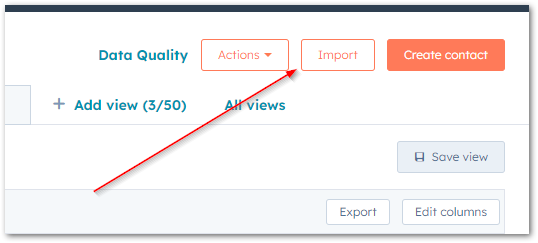
- Navigate to contacts or company
- Click on Import
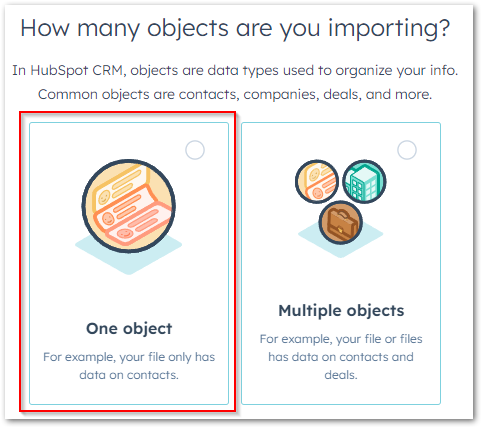
- Start an import > Import file from computer > One file
- Choose One object if you’re importing to either Contact or Company
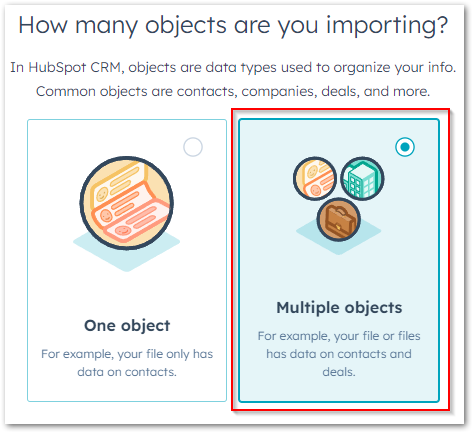
- Or choose Multiple objects if you’re importing to both Contact and Company records
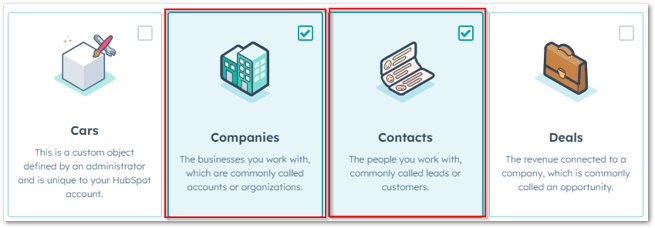
- Tick the relevant object/s you'd like to import
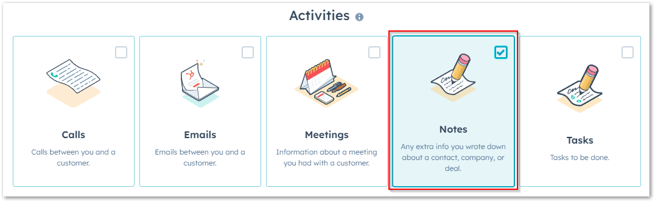
- Tick Notes in the Activities section
- Choose the exported file and set up relevant settings

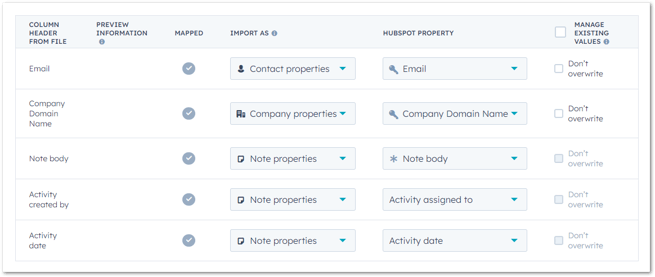
- Map your columns to relevant properties in HubSpot
- Navigate to contacts or company
- Click Next until your import begins
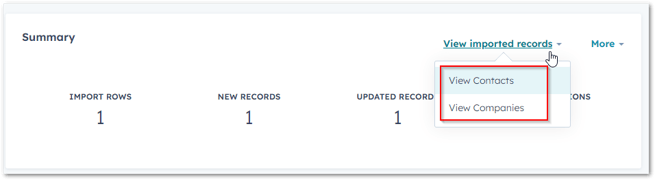
- Once import is done, you can quickly view your records that were part of the import file
- Your note will now be visible on relevant records
