Create a blog tag either through the blog tag dashboard or directly within the content editor
-
Log in to your HubSpot account and navigate to Marketing > Website > Blog.
-
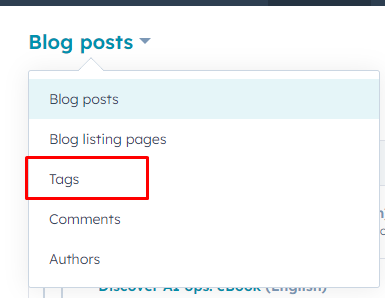
On the upper left side, click the dropdown menu labeled Blog posts and select Tags.
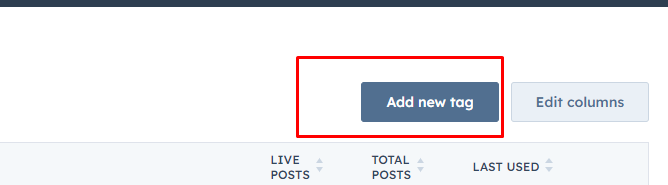
3. On the upper right corner, locate and click the "Add new tag" button.
4. Within the dialog box, enter a descriptive name in the designated Tag name field.
5. Select your preferred language from the Language dropdown menu, and then click the Create button.
Creating Blog Tags within the Content Editor
-
Log in to your HubSpot account and navigate to Marketing > Website > Blog.
-
Hover over the desired blog post and click on Edit.
-
Inside the content editor, click the File menu and select Blog settings.
-
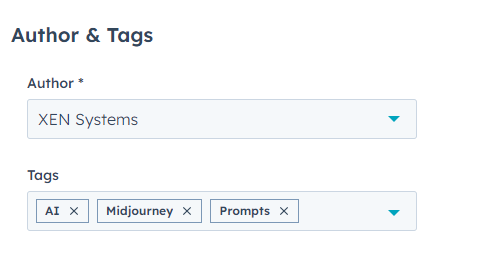
To add an existing tag, click the Tags dropdown menu and select the relevant tag. To create a new tag:
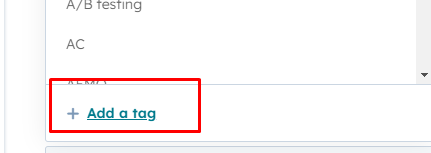
- Click the Tags dropdown menu.
- Input your desired tag in the designated field.
- Click + Add ["name of your new tag"] tag to incorporate the newly created tag.
5. To apply your changes, click Publish or Update located in the top right, and then click Publish now or Update now in the dialog box.
Editing a Blog Tag
Access your HubSpot account and navigate to Marketing > Website > Blog.
-
On the upper left side, click the dropdown menu labeled Blog posts and select Tags.
-
Hover your mouse over the blog tag that requires modification and click on the Edit option.

4. Within the resulting dialog box, enter the updated name for the tag, and confirm your changes by clicking Update.
Combining Blog Tags
-
Access your HubSpot account and navigate to Marketing > Website > Blog.
-
On the upper left side, click the dropdown menu labeled Blog posts and select Tags.
-
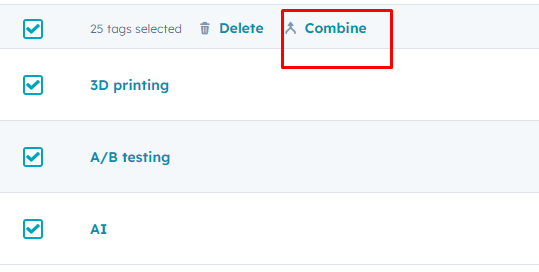
Select the checkboxes next to the tags you wish to combine.
-
At the top of the tag list, locate and click the Combine button.
5. In the ensuing pop-up box, select the replacement tag from the Tag to reassign to blog posts dropdown menu. This tag will replace the tags you've selected on existing blog posts.
Deleting a Blog Tag
-
Access your HubSpot account and navigate to Marketing > Website > Blog.
-
On the upper left side, click the dropdown menu labeled Blog posts and select Tag.
-
Hover over the tag you want to delete, then click the More dropdown menu and choose Delete.
-
Enter the word "delete" in the provided text field, and then click Delete to confirm the deletion of the tag.
Reference: https://knowledge.hubspot.com/blog/create-and-manage-blog-tags
HubSpot Blogs Articles: https://knowledge.hubspot.com/website/topics#blog