Setting up an automated email campaign is a smart way for solar dealers to manage their sales funnel more effectively.
You not only free up your sales team, but it also allows them to focus on quality leads. You can then track the interest of the lead by reviewing open rates, click-through rates and any other actions they take after receiving your email.
There are a bunch of marketing automation tools available on the market, but we like to use MailChimp for our solar dealer emails. It's user friendly and has lots of integration options available.
You might already be familiar with MailChimp's email offering. The marketing automation feature can be a little harder to set up. So here's our step-by-step guide to setting up marketing automation for your solar dealership.
Step-by-Step Guide To Setting Up Marketing Automation Using MailChimp
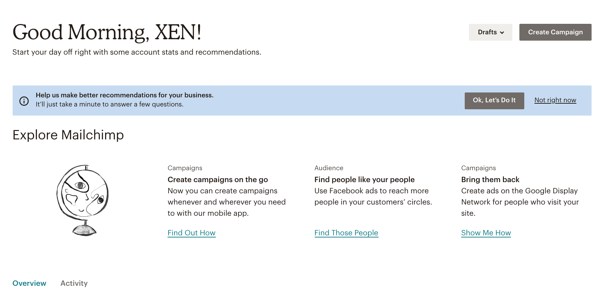
1. Login and click Create Campaign
2. Use the search bar to find Automation Campaigns
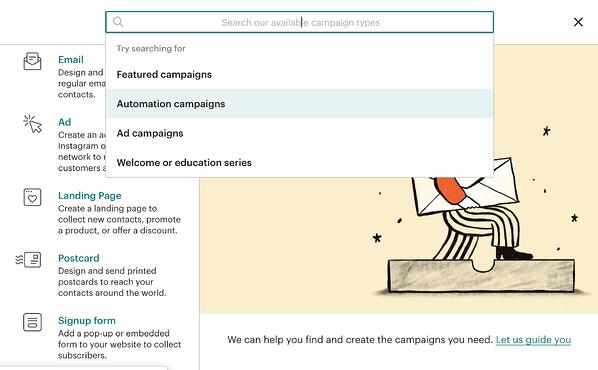
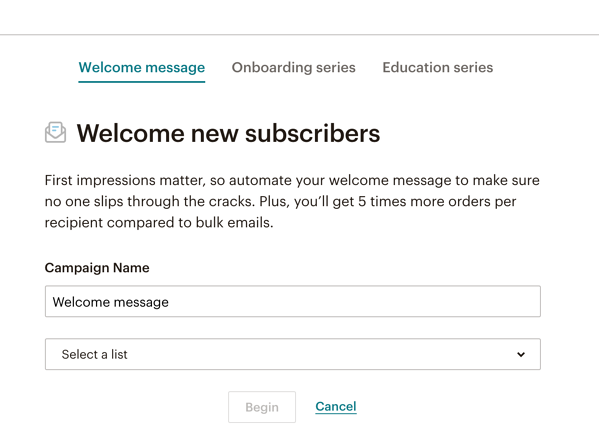
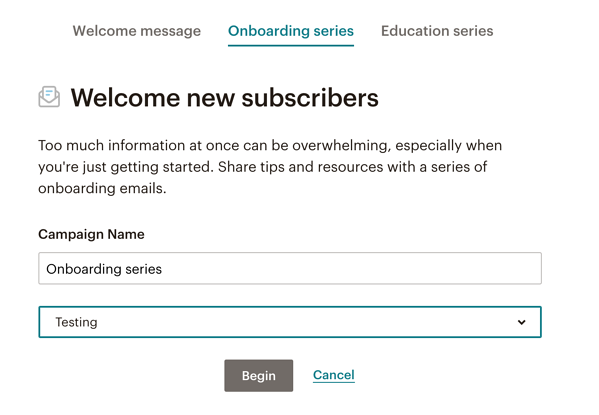
3. Select a template (eg Welcome New Subscribers)
4. From this screen, choose Onboarding Series in the top navigation
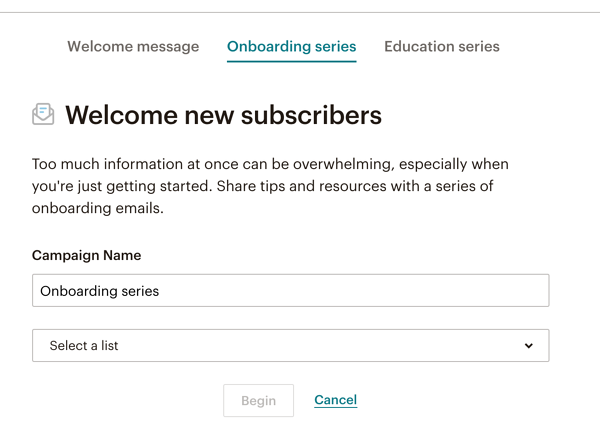
5. Notice the campaign Name changed to Onboarding Series. Now select a list to apply to your campaign, then click Begin.
For example, select the list for form submits from your eBook campaign
6. A series of messages will drop into view. There are a few tasks to do here.
(i) Click Design Email - to start drafting your email sequence.
(ii) Edit the Trigger option - to determine when the lead should receive the email. Usually, the welcome message is immediate, then the following emails can be spaced every few days.
(iii) Edit the Schedule option - to choose certain days of the week for emails to go out.
(iv) Edit the Filter option - to limit the queue to subscribers who meet certain conditions.
(v) Edit the Post-send action tool - an action to be performed on each subscriber after they receive your email.
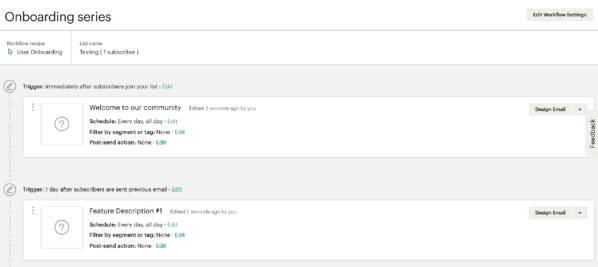
(vi) Complete the Workflow Configuration Settings
It's important to have a naming convention that allows you to keep track of campaigns and their workflow names.
Use a sender From Name that is easily identifiable by your lead. You can simply use your business name or the owner/dealer principle of the business.
Use a From Email Address that makes sense. Best to go to info@ or enquiries@ if possible.

(vii) Set the Tracking Parameters. We recommend the following check-boxes for simple automation emails. For the Google Analytics tracking, choose a good naming convention for the Title for Email so you can keep track of which emails are performing well.
![]()
Once you're happy with the workflow, click confirm. The workflow will now start sending and will be triggered to anyone who populates your nominated list from that point onward.