Summary
- Make a copy of the blog content google doc and move the copy to the correct client folder in Team Drive.
- Fill in any location-specific things or the client name to match the correct client and add client images including a featured image at the top of the doc (you can find these in their Team Drive folder or on their social pages).
- Have your team quality check/edit the doc and then share it with the clients for approval.
- Once approved, the team will advise it to be prepared as a post on the Dealer WordPress site as a draft.
- Have it checked and advised of the schedule/publish date.
- Once published, the post should be shared on the client's social channels.
- Add a relevant call to action at the bottom.
Steps
1. Setting Up The Blog Post Draft Google Doc
- Open the Google doc of the content you will be using for a blog post.
- Make a copy of the google doc.
- Move the google doc to the correct client folder in Team Drive (it should go to the dealer folder > Delivery > Content)
- Rename the copied doc to include the client name eg: <<Client name>> | Content | Questions to Ask Before Buying Solar Panels
2. Prepare the Blog Post Draft Content
- Update any location-specific spaces to the location of the client
- Some of the content we use is location-specific. There are spaces left for you to write in the correct location for the specific client. You can find their location by looking at their Task List name in Projects.
- Some of the content we use is location-specific. There are spaces left for you to write in the correct location for the specific client. You can find their location by looking at their Task List name in Projects.
- Update any <<Client Name >> spaces to the Client Name
- If there are spaces left to write in the client name. Please fill these in.
- Add in internal links (ie links to relevant pages or blog posts on the website)
- Featured image
- Add in a Featured Image at the top of the doc. Get the image from the client team drive folder or get an image they have posted on their Facebook page. Just make sure it's not used on other blog posts yet.
- Generally check the doc for any opportunities to customise it for the specific client (it may be applicable to slightly change headings, or CTAs if the client has a special on etc)
At this stage, send the doc sharing link for quality checking, someone on your team who will check the doc and then send it to the appropriate client for approval.
Once approved, move on to the next step.
3. Prepare Draft in WordPress
The draft can now be added in WordPress and formatted.
Follow our checklist for SEO items when preparing the blog post draft in WordPress:
- Optimise Title, Meta Description and slug
- Upload images and the featured image. Follow these best practices:
- Images should be 300KB or less
- Images should have these naming conventions:
- No spaces
- Use dash (-) instead of space
- Use lowercase only
- Should be descriptive but not long
- Example: solar-panel-installation-sydney
- Make sure you always use alt tags
- An alt tag should be a short description of what the image is
- Include keyword+target area
- eg: Solar Panel Install in Sydney
- Copy the alt tag to the title tag
- Add in internal links
- Add relevant tags and categories to each draft
Send the draft link for quality checking for approval and advise when to schedule or publish.
Publish your blog post
- Log in to your WordPress Administration Dashboard.
- On the left panel, click Posts tab.
- Click Add New.
- Enter your title and add your content to the editing box below it.
- Select a category, add tags, internal links, change author, add a featured image etc.
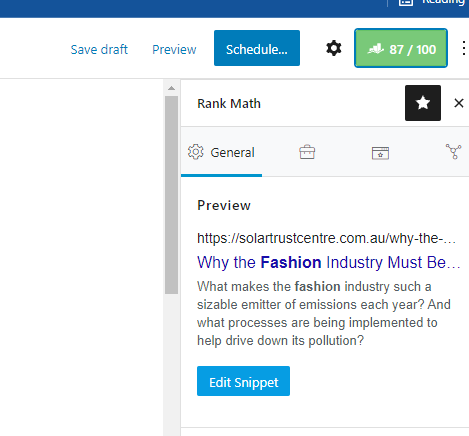
- Click on rank math to add a meta description and a focus keyword
- Preview your post.
- Send it for final quality checking.
- When your post is ready, click Publish or you can schedule for a later date and time.
